If you own a Samsung Android device, you might have heard about Odin Tool. It’s a powerful software used to flash firmware, unbrick phones, and repair software issues. But what exactly is it, and how does it work?
In this complete guide, we’ll cover everything about Samsung Odin Tool—its features, uses, step-by-step flashing process, and troubleshooting tips. Whether you’re a beginner or an advanced user, this guide will help you understand Odin like a pro.
What is Odin?
Samsung Odin is a powerful tool used to flash stock firmware, custom ROMs, TWRP recoveries, and root files on Samsung Android devices like Galaxy S, Note, and others. It works with both old and new models, including S10, S9, S8, Note 9, Note 8, and more.
You can use Odin to install official updates, unbrick a soft-bricked phone, or gain root access using TAR files. To flash custom ROMs, root access is usually required.
Samsung Odin Tool – Key Features
Here are the main things you can do with the Samsung Odin tool:
- Flash Stock Firmware – Fix software issues like boot loops, crashes, or bugs by installing the original Samsung firmware.
- Flash Custom ROMs – Replace the default software with custom firmware to add new features or tweaks.
- Flash Recovery (TWRP/Stock) – Install custom or stock recovery modes to perform backups, wipe data, or install ZIP files.
- Flash Kernels – Install custom or stock kernels (.tar/.img) to change how your device’s hardware functions.
- Flash Root Files – Gain root access by flashing root packages like Magisk or SuperSU (.tar/.md5 files).
⚠️ Always ensure files are compatible with your device to avoid errors or soft-bricks.
Download Samsung Odin for Windows
You can download the tool for Windows (32-bit or 64-bit) using the links below.
How to Download and Use Odin Tool
Before using the Tool, you need:
- A Windows PC (7/8/10/11)
- USB drivers for your MediaTek phone
- The correct firmware for your device
- A USB cable
Step-by-Step Instructions
1. Download Odin Tool:
- Get the latest Odin from the above download links.
- No installation needed – just extract and run
Odin.exeas an administrator.
2. Prepare Firmware File:
- Download the correct firmware for your device (it should be a
.tar,.tar.md5, or.binfile). - Extract it if it’s in a ZIP or RAR archive.
3. Install Samsung USB Drivers:
- Make sure your PC has the latest Samsung USB drivers installed.
4. Boot into Download Mode:
- Power off the device.
- Press and hold Volume Down + Home + Power together.
- When warning screen appears, press Volume Up to enter Download Mode.
5. Connect to PC:
- Use a USB cable to connect your phone to the PC.
- Odin will show “Added” if the connection is successful.
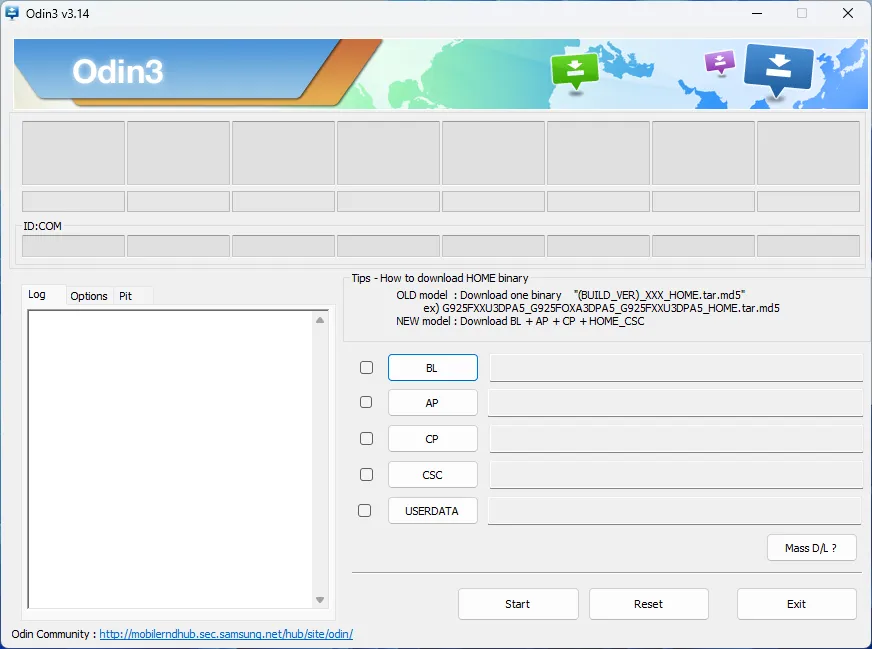
6. Load Firmware in Odin:
- Click the “AP” (or “PDA”) button in Odin.
- Select your
.tar.md5firmware file.
7. Flash the Firmware:
- Make sure Auto Reboot and F. Reset Time are checked.
- Do NOT check Re-Partition.
- Click Start to begin flashing.
8. Wait for Completion:
- When finished, you’ll see a green PASS! message in Odin.
- Your device will reboot automatically.
Alternatives
If it doesn’t work, try these alternatives:
- MTK Droid Tool – For backup and root.
Have questions? Drop them in the comments below!